


Living with a Volvo 740
By Don Chapman
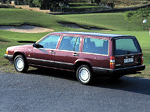
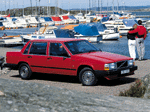
Our 740GL automatic is now almost 11 years old, with some 110,000 miles on the clock. The purpose of this article is to share a few thoughts on living with the 740, and some experiences and hints on carrying out some fairly basic maintenance jobs. Grateful thanks to Volvo Car UK for figures quoted which are from their publication. The most basic, and one of the most vital servicing jobs is changing the engine oil. I use Amsoil 10W/40 synthetic oil, and only genuine Volvo oil filters. Drain the oil when hot, and use only good quality oil and filters - engines are much more expensive. Remember to smear engine oil on the filter sealing ring, it makes removal much easier. Don't overtighten the filter, about V, - % of a turn after the seal contacts the block. Volvo recommend changing the spark plugs at 6,000 miles, but this seems a bit short, so I clean them and check the gap, renewing at 12,000 miles. A smear of copper grease on the threads is a good idea to prevent the possibility of the plugs seizing in the alloy head. Check the power steering fluid level at dipstick is in the reservoir mounted on the nearside inner wing. Inspect the battery, cheek the electrolyte levels and that the leads are clean and secure. Check the engine idle speed (carb engines - automatic 900rpm, manual 800rpm), and the CO emission level - not having a meter I leave this to a Dealer service.
Although not specified in the service schedule, I also check the rear axle oil level. Volvo do not specify changing the rear axle oil, but I like to change it about every 2 years, using Amsoil 80W/90 synthetic. I'm a great believer in high-quality lubrication to prevent wear. Obviously the car must be as level as possible when checking oil levels to get an accurate reading. Whilst carrying out a service, I always have a thorough look at the underside, checking for oil leaks, rust, damage etc. Also the exhaust system, prop-shaft, fuel lines and tank and brake pipes should be inspected for leaks or damage. Problems are often solved more cheaply and easily if spotted early, plus of course there is the vital aspect of safety. Years ago I fitted Volvo oil pressure and temperature gauges in the dash. Now at 110,000 miles the oil pressure shows no sign of dropping. Volvo gauges are quite easy to fit, and of course, match the rest of the dash perfectly - be careful choosing gauges, some fit the right side of the dash, and some the left, so not all combinations are possible.
I wrote some time ago about changing the water pump and the coolant. One point worth mentioning again is to remember to secure the pump fasteners finger tight only, then lever the pump firmly upwards whilst tightening the nuts and bolts. The rubber seal between the pump and the head must be compressed, otherwise leaks will surely occur. Use a 50/50 mixture of Volvo coolant and water year round to prevent both freezing and corrosion. On the V6 engine this is even more important as this engine has an alloy crank-case with wet liners sealed top and bottom. if corrosion occurs in the water jacket, coolant can leak past the bottom seal into the sump, it's then time for a new engine.
Four years ago I had to renew the rear discs because of rusting (strange because the car was used almost every day). The procedure to change the rear discs is as follows:- jack up the car and remove the wheel, for safety axle stands should be used rather than just the jack. Tap out the two retaining pins which hold the pads in the caliper using a hammer and small punch. Press each pad away from the disc using pliers, and pull the pads out of the caliper with antisqueal shims if fitted. Be careful not to breathe in the brake dust. Clean up the caliper with a damp rag, or brake cleaner. Next, remove the two caliper securing bolts (the two nearest to the hub). Do not disconnect the hydraulic hose. Tie the caliper up out of the way so that no strain is placed on the flexible hose. Remove the wheel locating pin. Make sure the hand-brake is fully off and pull off the disc, tapping it free with a soft faced mallet if necessary. The rear disc incorporates the hand-brake drum, so take the opportunity to inspect the hand-brake linings, and to clean these and the operating mechanism. Assembly, as they say, is the reverse of the dismantling procedure, but several points are worth mentioning:
1) If fitting new discs, remove the preservative
with a cloth and white spirit or similar solvent.
2) When re-fitting the
calipers make sure the flexible hose is not twisted. new bolts should be used.
Apply Loctite or similar thread locking compound to the bolts and torque up to
431b ft (58Nm).
3) Check that the pistons move freely in the caliper.
4) Apply copper grease to both sides of the anti-squeal shims and to the back
of the pads, taking care not to contaminate the friction material. Apply copper
grease to the retaining pins to facilitate future removal.
Front brake pad renewal goes as follows: jack up, remove the wheel and preferably support the car on axle stands. Remove the caliper lower guide pin bolt; on Girling calipers also slacken the upper guide pin bolt. You can now pivot the caliper upwards and remove the rubber bellows. Support the caliper to avoid straining the flexible hose. DO NOT press the brake pedal with the caliper removed - this will cause much sorrow. Lift the pads and anti-squeal shims from the caliper bracket. Note the position of the pads if they are to be re-used, so that they are replaced in the same position. NB if any of the 4 pads are worn down to minimum thickness, all 4 must be replaced. Clean the caliper and bracket as previously mentioned. If new pads are to be fitted, press the pistons back into the calipers using pliers and taking care not to damage the dust seals. Apply copper grease to the anti-squeal shim and the back of the pad, and replace pad and shim on the caliper bracket. Carefully swing the caliper down over the pads making sure that the antirattle spring in the caliper is correctly located. similar to the lower guide pin bolt insert it and tighten to 251b ft (34Nm). Press the brake pedal several times to bring the pads to the surface of the disc before you drive the car for the first time otherwise a nasty shock may result at the first corner.
What do I like most and least about the 740? Most - after nearly 11 years, the body-work is almost entirely rust-tree The car is roomy: comfortable, easy to work on and has proved incredibly reliable. The running gear is superbly engineered, and capable of massive mileages of trouble-free motoring. 21 of the 40 highest-mileage cars on Volvo's own list are 700's. Least - after my 1983 244GLE I found the brakes disappointing, and still do. Even compared with the pool car which I drive (Escort diesel) they are less firm and positive. If pushed, eg when using the kick-down on the auto transmission the engine is rough and noisy, certainly not in the same league as, say, the BMW 6-cylinders. Performance, certainly on the carburettor version is adequate rather than exciting - very different with the turbo versions of course. Overall - an excellent and very satisfactory car.
Legal | Privacy | Contact Us | Search | Site Map
Volvo Owners' Club Limited® 1962-2026