Volvo AW7X Valve Body Rebuild Page 8
Aisin-Warner AW-7X Valve Body Service in a Volvo 7XX-940 Car: Page 8
All information written by Brad Wightman and used by his kind permission.
- Remove the bolts holding the accumulator piston retainer plate in position and carefully remove it. Install and tighten all the valve body bolts alternately to the correct torque of 6 - 9 ft lbs. (8 - 12 Nm).
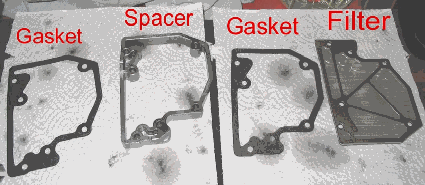
- Install the oil filter. Torque bolts to 3.5 - 4.5 ft lbs. (5 - 6 Nm). See pic below.

This pic shows the sequence of assembly. Filter goes at the bottom obviously.
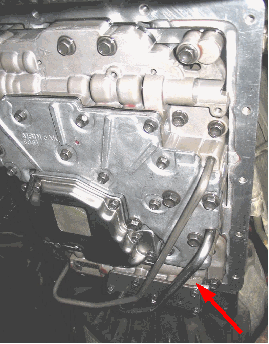
- Reattach the oil pipes onto the valve body. See pic below.

Valve body installed in transmission. Front is to the bottom. The red arrow points to the short oil feed pipe. This pipe attaches to the front and the side of the valve body. This pipe will require some strength to put back in place. It is held in by friction only. Ensure that it is fully engaged in its holes at both ends.
- Reattach the kick-down cable if you didn't do it earlier. Ensure that the cam pulley can return to its full rest position. Adjust the cable if necessary.
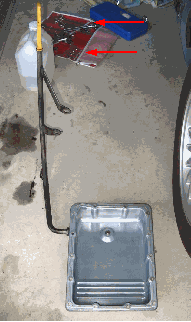
- Clean out the oil pan and place its gasket in position. See pic below. Install the pan on the transmission and bolt in place. Torque for sump bolts is 3 - 3.5 ft lbs. (4 - 5 Nm).
- Place the starter motor in position and install the bolts to secure it and the filler tube in position. Reattach the wires to the starter motor.

Pan and filler tube clean and ready to install. The filler tube stayed on because the nut had seized up. Starter motor bolts were removed to get the pan off. The arrows point to the brackets that are held in by the starter motor bolts.