
Volvo Headliner Replacement Option 3
Page 1: Headliner Repair: Introduction and Prep
Page 2: Removing Headliner Panel and Sunroof Headliner
Page 3: Headliner Repair: Board Repair, Fabric Replacement, and Reinstallation
3. Headliner Repair: Board Repair, Fabric Replacement, and Reinstallation
Below are instructions for uncovering and repairing the damaged headliner board, and re-covering it with new headliner fabric.
Materials:
Standard mechanic's tools (wrenches, ratchets, extenders, screwdrivers, nut-drivers, etc.)
- Replacement headliner material
- Soft-bristle brush
- Glue gun and
- Spray-on automotive-grade contact adhesive
- Duct tape
- Razor knife
- Scissors
- Respirator mask
- Eye protection
Repairing a Damaged Headliner Board
Since our headliner board broke apart upon removal to fix a sagging headliner, repair to the board would be required. This situation is not uncommon since sun and heat damage typically causes headliner boards to become brittle and increasingly fragile over time. Many are simply made from a pressed-cardboard material. However, in our case the damage to this board was repairable.
- Begin by scrubbing all of the old foam and glue from the headliner board using a soft-bristle brush or coarse sandpaper. (figures A and B). This step is critical to repair of the old board since the new covering will need a clean surface to adhere to. Without a good attachment, a new covering will sag just as the old one did.
- Important: Avoid using a wire brush. It may tear the headliner board.
- Important: Never use a chemical glue-remover to clean old adhesive from a headliner board.
- The repair begins of the back (underneath) side of the headliner board. Lay the broken pieces out onto a flat surface to align them (figure C).
- Use caution when aligning the pieces to avoid overlapping the edges. Creases left from overlapping will show through the new fabric.
- You can use ordinary duct-tape to join the cracks where the pieces join together (figure D). Double-tape all of the cracks to ensure a secure repair.
- Important: Avoid using duct tape on the interior side of the board, as it will leave a crease in the headliner fabric.
- Trim away any the excess duct tape along the edges using a razor knife (figure E).
- Repeat these steps to repair all of the damaged areas.
- Once all of the parts of the headliner board have been joined together securely, carefully flip the board back over. You're now ready to apply the new fabric cover.
- The fabric covering comes with a cloth side and a foam side. You'll need to have a piece of fabric slightly larger than the headliner board so that the edges of the fabric hang over the board on all sides. I cut the fabric 6" longer than the board.
- Important: Use only a spray adhesive specially formulated for use with auto trim. This type of glue is made to withstand extremes of heat and cold and continue to hold its bond.
- Safety Alert: Always work in a well ventilated area when working with spray paint, glues, solvents or other hazardous chemicals.
- The contact adhesive should be applied with a glue sprayer to the surface of the board (figure F) and to the foam side of the fabric covering. The bond forms when the two surfaces are brought together, and the glue achieves optimum tackiness for bonding about 30 seconds after spraying. Once the glue has been sprayed onto both surfaces, you can carefully lift and position the fabric, allowing it to drape over the edges of the board (figure G).
- Fold the fabric in 3 sections - no cutouts for sunroof - and glue one section at a time. Using the sprayer, apply an even coat of glue to the first third. Get your helper and start at the rear being sure to totally anchor the molded section allowing headroom for the backseat. Smooth the fabric down onto the board, beginning at the center and working your way outward.
- Repeat the process, spraying the foam surface of the cloth and the board surface, on the remaining thirds. Once that application of glue has set up and is tacky, drop the fabric into position (figure H) and press the fabric lightly to smooth it and glue it down (figure I). Avoid pressing down heavily onto the fabric as this may force the glue to the surface. After doing all 3 sections, trim to 1" around edge and flip over and spray glue to secure.
- An alternative method first adheres the center of the fabric to the board, a tip passed along by an auto upholsterer. Assuming you have the backer board out of the car and nicely cleaned up, run one pass of adhesive along the backer board midline.....one end to the other..... and then one pass on the new headliner material along its midline. Glue headliner to backer board. Then fold one half ofthe headliner material back from edge to glued midline, spray adhesive on half the backer board and the folded back part of the headliner. You may want to place clean paper around the headliner edge between the two layers before spraying adhesive so it doesnt get on the other half of the headliner which is facing up. Then, roll the headliner back onto the backer board starting at the midline. Slow and steady, light pressure with your hands, and it should lay down flat and smooth. Then repeat for the other half.
- With the headliner fabric in place and properly contoured, you can flip the headliner board over (figure J) to trim the excess fabric from the edges.
- Start by cutting around the outside, leaving an inch or so of overlap. For the sunroof opening - cutout leaving 6" fabric to secure to the roof opening in the sunroof frame. (figure K).
- Use your scissors to punch holes in the fabric in the appropriate locations for the visors and mirror.
- Fold the overlap along the edges and glue it down along the front and back (figure L).
- This sunroof panel, is consists of two pieces that will be covered separately. Begin by peeling off the old fabric covering the panels (figure M). This may be more difficult to remove than the fabric that was covering the headliner but the glue is easier to remove and cleanup is quicker.
- Important: A commercial grade automotive contact cement will be required to bond the fabric to the metal frame.
- The headliner material is attached to the sunroof panel by gluing only the edges of the sunroof panel, and not the backside of the panel.
- Once the glue has been applied, stretch the fabric tightly over the panel to make the fabric thinner. This will make the sunroof headliner slide more easily and fit better. Fold the material over the edges and press the fabric down (figure N). This side of the panel will not be visible once the panel is installed, so it won't matter if the glue bleeds through the fabric in these locations when pressed down.
- Once the glue has set, cut an opening for the vent and trim away the excess (figure O). Fold over any remaining overlap and glue it down tight.
- Repeat the steps for the other portion of the sunroof panel. Remember that glue only needs to be applied so that the edges are secured on the underneath side of the panel -- unlike the gluing process used earlier for the headliner board.
- With the sunroof removed, it's a good time to check some of the operating components such as the drains and motor. On this vehicle, the drains connect to four separate water hoses (figure P) that drain the water away and out of the car. Check the drains to ensure that they are not clogged, and check the hoses and clamps to make sure they are in good order. Also check the drain troughs to ensure that they are not blocked with debris.
- Check to see if your sunroof mechanism needs lubrication. Since our vehicle has a power sunroof, we took this opportunity to check the electric motor and wiring (figure Q). If your power sunroof motor is dragging or causing problems, this would be a good time to replace it.
After repairing the board and recovering the material, the headliner and sunroof panel are reinstalled in the vehicle. [Chris] I put the board back in the car through the front passenger side of my sedan, the same way I took it out. I moved the seat as far back as possible, and lowered the back as far down as possible. It does go in without taking the seats out. Try real hard to get the new headliner board back on the roof without breaking it.
All vehicles:
- Install in reverse order. A slight deformation of the headlining paper material (not the cloth) at the sun visor attachments is OK as it is not visible once the headlining is installed.
- Vehicles with sunroof:
- tape the leads in the recess in the top of the headlining;
- position rear drain hoses in headlining recesses
- keep drain hose screw clamps from exerting pressure on headlining
- apply double-sided tape to base plate around sunroof opening
- Slide in headlining beneath the rear side panels and loosely support front edge on the sun visor attachments or mirror. Sedans/saloons: slide in headlining through passenger side door; wagons/estates: slide in through rear hatch. In both cases this is a two person job. Insert the headliner into windshield molding first and then reinstall first the driver's side molding then the passengers side molding by screwing in the above-door handholds: this helps secure the headliner. Then proceed to rear seat moldings using the handholds and then insert the 2 plastic roof screws. If it helps, loop a cord around the roof, through the windows, and beneath the headliner to stabilize it.
- Vehicles with sunroof: remove backing paper from tape installed to hold fabric;
- Center: install headlining at rear with clips (pre-92 have two clips; 92+ have three)
- Vehicles with sunroof: stretch material around sunroof opening; fold in edge and install edge protector molding with joint at center of rear edge with joint cover
- Reinstall trim panels and attachments.
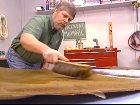 Fig A |
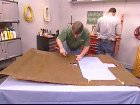 Fig B |
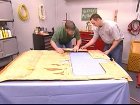 Fig C |
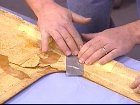 Fig D |
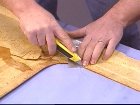 Fig E |
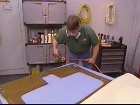 Fig F |
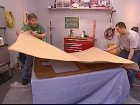 Fig G |
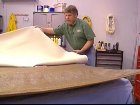 Fig H |
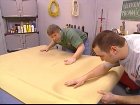 Fig I |
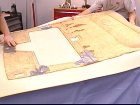 Fig J |
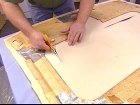 Fig K |
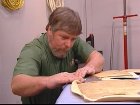 Fig L |
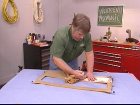 Fig M |
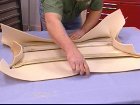 Fig N |
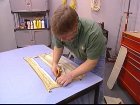 Fig O |
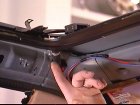 Fig P |
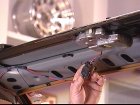 Fig Q |