Volvo Window Switch Repair PDF
Repairing Power Window Switches, courtesy of Mike Ponte
This file is edited from Mike's excellent site at: http://www.mikeponte.com/volvo/volvo.htm with an additional comment from Justin Lancaster.
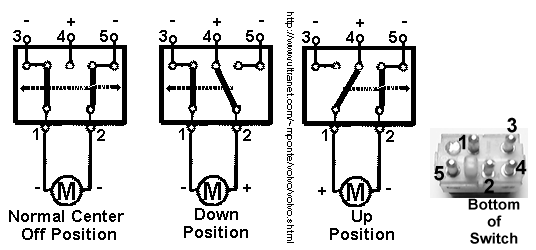
Below is the schematic diagram of the window switch, showing all three positions. In the normal position, contacts 1-3 and 2-5 are made. When the switch is pushed into the down position 1-3 remain closed but 2 moves to 4. In the up position 2-5 remain closed but now 1 moves to 4.


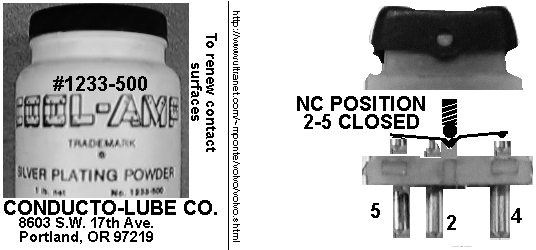
After burnishing the contacts with a Scotchguard nylon scrubber, very fine sandpaper or emery cloth, it is helpful to re-silver them. The motor draws a few amps and a clean, silver surface will make the switch trouble free for a while. The photo on the left shows a jar of silver powder and the address of the company that sells the product. I have no affiliation with them. The photo on the right shows how the switch works in the relaxed position. There are two contacts that are closed on each side of the switch. Terminals 1 and 2 are always touching the moving contact.

[Justin Lancaster] The switches have four contacts inside: only two are used to lower or raise the windows via the switch wiring. You will notice that the contact pads are worn in these spots. By merely reversing the movable contacts (either by swapping them side to side or actually rotating them around) you expose the unused contact pads and double the switch life. No need to re-tin or re-surface the worn pads.